You have successfully evicted your uninvited attic guests, but the question remains: is the insulation they lived in still safe for your family? The answer depends entirely on the type, extent, and duration of contamination left behind. Understanding the difference between minor soiling and deep biological contamination is critical before you decide whether to keep, repair, or fully replace your attic insulation.
Key Takeaways
Even after humane wildlife eviction, your attic insulation may still harbour dangerous contaminants that affect your household’s health and energy performance. Here are the essential points every homeowner should understand:
- Contaminated insulation can lead to health risks and energy loss long after the animals are gone, because animal feces can carry diseases and pose health hazards that persist in dried waste and dust.
- Minor, localized soiling covering less than one to two square metres may be cleaned and spot-repaired, but widespread urine, droppings, or nesting materials almost always require full attic insulation replacement.
- Professional attic restoration-including a detailed inspection, controlled safe removal, disinfection, and re-insulation-is the safest way to address contaminated insulation and prevent airborne particles from entering your living space.
- Homeowners should act within days or weeks of wildlife removal, not months or years, to prevent lingering odours, mildew growth, mould, and reduced energy efficiency.
How to Know If Your Attic Insulation Is Still Safe After Wildlife Removal
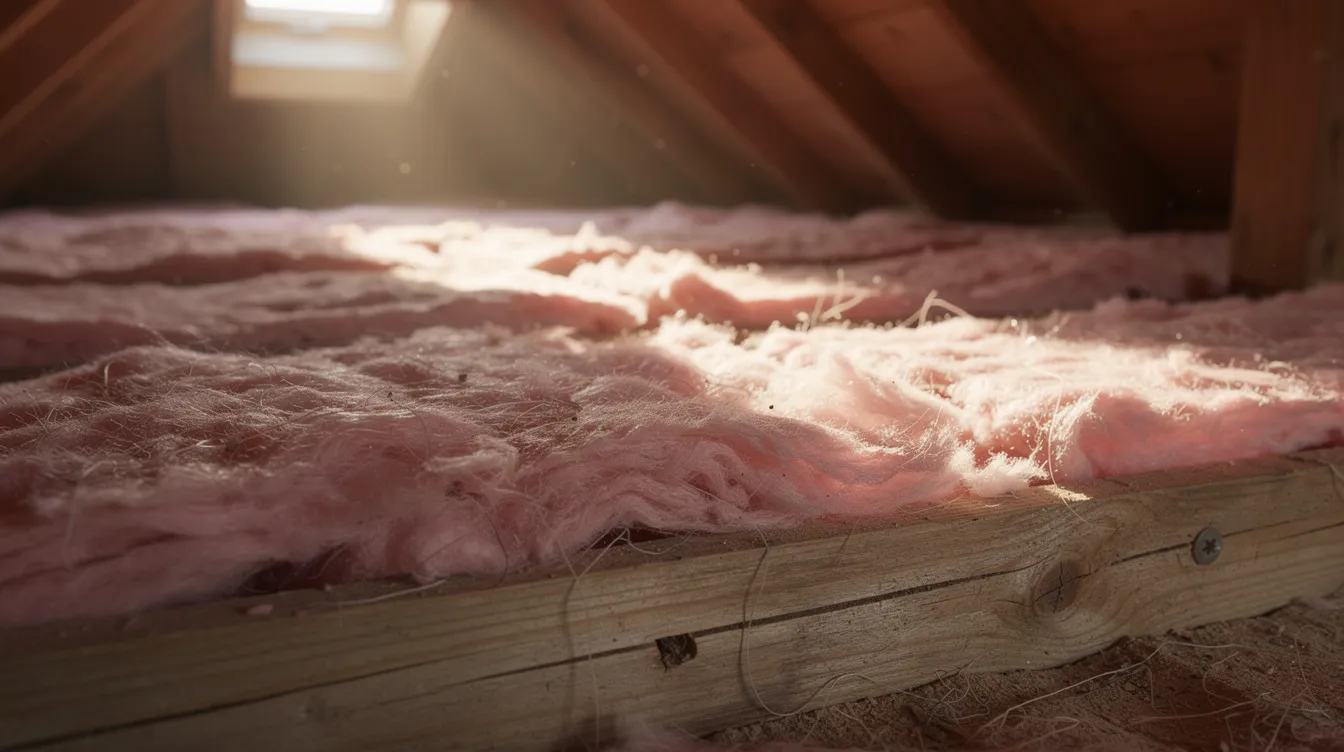
Your attic insulation is only “safe” if it remains dry, structurally intact, and completely free of animal waste, parasites, and mould. If any of these conditions are compromised, the insulation may be actively degrading your indoor air quality and thermal performance. Attic insulation may be contaminated by wildlife feces and urine even when the visible damage looks minor, so a thorough assessment is non-negotiable.
Before re-entering or inspecting the attic space, confirm that wildlife has been fully excluded and that any one-way doors or live traps have been removed. Without this confirmation, entering the attic is premature and potentially dangerous.
Red flags that mean insulation is likely unsafe:
- Strong ammonia-like odours, which indicate deep insulation contamination that has soaked beyond surface level
- Visible droppings along beams, in corners, or scattered across joist bays
- Urine stains presenting as yellow or brown discoloration on batts or blown-in fill
- Shredded insulation mixed with nesting debris, or tunnels carved through loose-fill material
- Dark, stained patches on ceiling drywall traced back to the infestation period
Insulation can be considered “probably safe” only when waste is limited to a very small, clearly defined area, there is no mould, and a professional inspection finds no active wildlife or nesting sites. Borderline cases should always be confirmed by a professional attic restoration technician who can test for moisture and hidden contamination before advising on full or partial attic removal.
Common Signs Your Attic Insulation Was Contaminated by Wildlife
Many animals do not simply sit on top of insulation-they burrow, tunnel, nest, and deposit waste deep within it. Recognizing the common signs of contaminated insulation requires looking beyond the surface for subtle visual, biological, and structural clues.
Visual signs:
- Matted or flattened fibreglass batts where larger animals like raccoons have walked or nested
- Trails or tunnels through blown-in insulation, squirrels create tunnels in insulation up to 3 inches wide
- Shredded paper, fabric, or cardboard boxes mixed into the material, used by rodents to create nests
- Patches where floor joists are exposed from displaced material
Biological signs:
- Rodents leave droppings and urine as clear infestation signs, often concentrated along beams or near vents
- Urine-soaked sections with yellow or brown staining that can damage insulation far beyond the visible area
- Greasy rub marks around entry holes left by many animals repeatedly passing through
- Bat droppings (guano) piling beneath rafters, and bats leave behind guano that produces strong ammonia odours
- Baby raccoons and adults establishing latrine sites that concentrate waste in specific zones; raccoons make loud noises and vocalizations in attics, which may have first alerted you to the problem
Structural and mechanical clues:
- Chewed wires, gnawed vapour barriers, and damaged ductwork
- Insulation pulled away from soffits or vents by nesting activity
Indirect warning signs include higher winter heating bills, uneven snow melt on the roof, or persistent musty odours that do not fade weeks after eviction. Rodents can compress insulation, reducing its effectiveness and driving up cooling costs season after season.
Health Risks of Contaminated Attic Insulation
Health concerns do not end when the animals leave. Their waste remains trapped in the attic insulation and dust, creating ongoing exposure risks for everyone in the whole house. Contaminated insulation can lower indoor air quality significantly, and the hazards vary by species.
| Wildlife | Key Pathogens / Risks |
|---|---|
| Mice and rats | Rodent droppings can carry Hantavirus and Leptospirosis, plus Salmonella |
| Raccoons | Roundworm eggs (Baylisascaris) in latrines; raccoons can transmit rabies and leptospirosis to humans |
| Bats | Bat guano can introduce harmful fungal spores into the home (Histoplasma capsulatum), causing respiratory illness |
| Ectoparasites | Fleas, mites, and ticks in nesting areas can migrate into living spaces |
Rodent waste can carry diseases like Hantavirus, which has an approximate 38% fatality rate when untreated. Dried rodent droppings can become airborne and cause illness when disturbed-even by minor attic activity like walking near contaminated areas. Microscopic airborne particles carrying harmful bacteria and pathogens enter living spaces through light fixtures, attic hatches, and HVAC systems.
Symptoms homeowners may experience include persistent cough, allergy-like reactions, headaches, or unexplained odours that worsen when HVAC runs. Children, elderly household members, and immunocompromised individuals face elevated risk. Any removal of contaminated materials should be done with proper protective equipment including P100 respirators and HEPA filtration, or by a professional crew. DIY sweeping or shop-vacuuming dramatically increases exposure.
When Can You Safely Keep Existing Attic Insulation?
Full insulation replacement is not always mandatory. Sometimes limited contamination after a short-term infestation can be resolved with targeted cleaning and repairs, saving homeowners significant cost and time.
Scenarios where keeping most insulation may be reasonable:
- A single squirrel or mouse removed within the past few weeks
- A small cluster of droppings near the access hatch with no spread
- One isolated nesting area that has not soaked into surrounding batts
Objective criteria for “minor contamination”:
- The affected area is approximately one to two square metres
- No evidence of long-term nesting or repeated use
- No strong, pervasive odours beyond the immediate contaminated areas
- No visible mould growth on rafters or sheathing
In these situations, a technician can remove only the contaminated insulation sections, bag and dispose of them, sanitize exposed surfaces with specialized sanitation agents, and patch the area with new insulation matching the original R-value. However, homeowners should still arrange a professional inspection to confirm that wildlife entry points have been sealed and that there is no hidden damage behind knee walls, around chimneys, or under stored items.
When You Should Replace Attic Insulation After an Infestation
Widespread, long-term wildlife activity almost always justifies full insulation replacement for safety, odour control, and energy performance. Attic insulation often needs replacement after wildlife infestations because large infestations often spread contamination too far to treat spot-wise. Sanitizing contaminated insulation across an entire attic can be difficult and ineffective compared to full replacement.
Situations calling for full replacement:
- Heavy droppings spread across joist bays-replacement is necessary if droppings and urine are widespread
- Large raccoon latrines; raccoons can compress insulation and introduce contaminants across wide areas
- Bat colonies active for one or more seasons
- Rodent damage with nesting tunnels throughout the entire attic
Non-visible reasons to replace insulation:
- Strong smells travelling through vents or pot lights into living areas
- Repeated illnesses in the household linked to contaminated insulation exposure
- Severely compressed insulation with R-value far below code recommendations
- Insulation that has suffered significant water damage from urine saturation or roof leaks worsened by wildlife activity
- Heavy contamination may cause moisture buildup and mould in insulation, compounding structural risk
Very old insulation installed before the 1990s, or insulation suspected of containing asbestos or vermiculite, should not be handled by homeowners and may require specialized negative-pressure removal. Severe contamination combined with chewed wires, damaged vapour barriers, or mould on roof sheathing should be treated as a full attic restoration project rather than a simple patch repair.
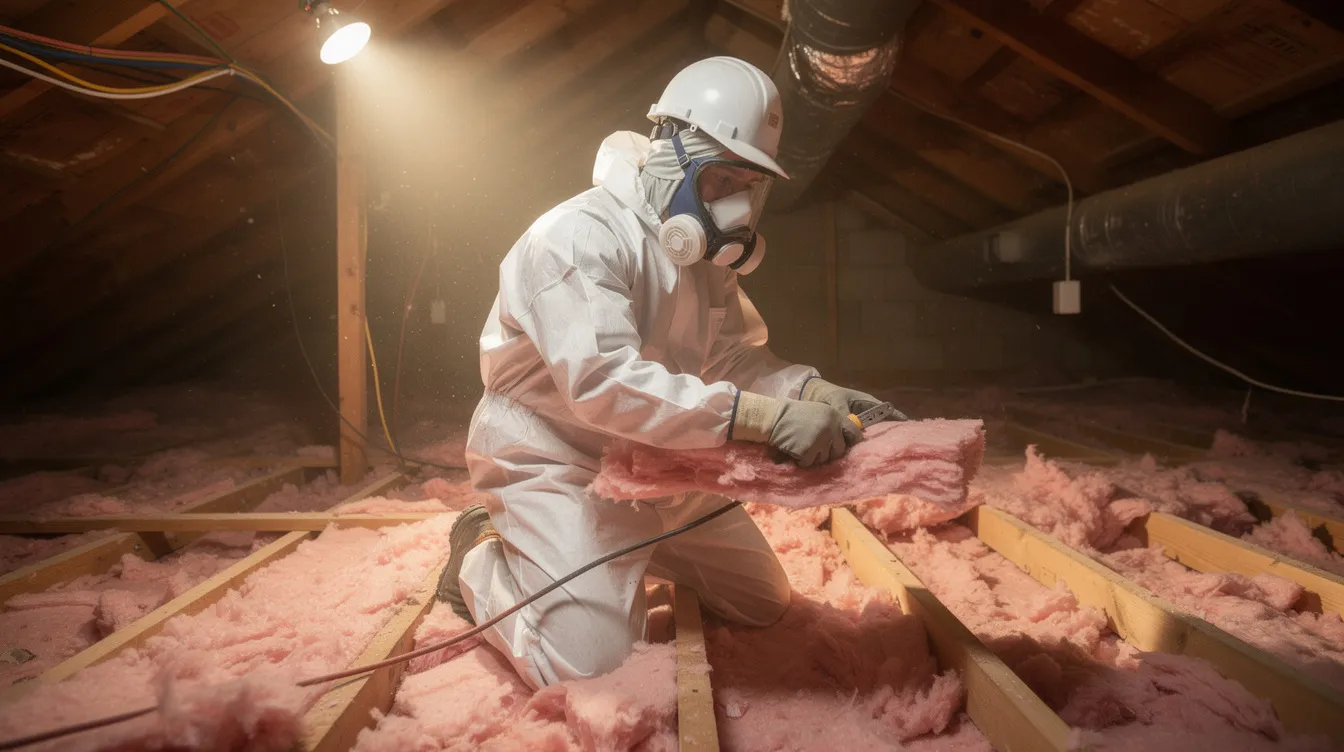
What a Professional Attic Restoration and Insulation Replacement Involves
A complete attic restoration after wildlife removal typically happens in defined stages. The remediation process ensures contamination is fully addressed rather than simply covered over. Professional removal prevents airborne contamination during insulation replacement by using containment and filtration systems that protect the living space below.
Stage 1 – Detailed Inspection: A technician enters the attic, maps contamination zones, checks structural vulnerabilities, including chewed wires and wet spots, and locates all past entry points around vents, soffits, and roof gaps. A full inspection identifies damage before attic restoration begins. Professional inspection can identify hidden moisture and contamination that homeowners typically miss.
Stage 2 – Controlled Removal: The cleanup process includes setting up containment, wearing full protective gear, and using commercial-grade HEPA vacuum systems to pull heavily contaminated insulation into sealed bags. Contaminated insulation must be carefully removed and bagged, with waste transported directly outside-safely disposing of it without spreading dust through the home.
Stage 3 – Decontamination: Attic restoration includes disinfecting affected surfaces after removal. Technicians apply industrial grade disinfectants and hospital-grade antimicrobials to exposed wood and drywall. Enzyme-based deodorizers are used to neutralize odors during attic restoration where urine has soaked into framing. The cleanup process may also include fogging to reach tight spaces.
Stage 4 – Re-Insulation: Sealing air leaks in top plates and around fixtures, installing baffles to keep soffit vents clear, then adding new insulation to reach code-level R-values. New insulation must meet R-50 to R-60 standards after restoration, which reduces heating and cooling costs while improving energy efficiency for the long term.
Choosing the Right Insulation Material After Wildlife Damage
The material chosen for replacing attic insulation after wildlife damage can influence future pest resistance, moisture control, and overall performance. Many homeowners are surprised by how much the right product selection matters for long term protection.
| Material | Pest Resistance | Moisture Resilience | Notes |
|---|---|---|---|
| Blown-in fiberglass | Moderate | Moderate | Fills irregular spaces well |
| Cellulose (borate-treated) | High-boric acid treatment deters insects and other pests | Lower when wet | Good noise reduction properties |
| Mineral wool | High | High | More costly, fire resistant |
| Spray foam | Very high | Very high | Excellent air sealing, higher cost |
| Fiberglass batts | Lower | Moderate | Easier future inspections |
Some homeowners choose specialized insulation products like tap pest control insulation, a thermal acoustical pest control product. Companies that offer thermal acoustical pest control solutions install tap insulation as a blown-in option that deters insects while providing superior soundproofing that makes the home quieter and offers multiple advantages over traditional insulation, including reducing noise transmission and multiple advantages in pest deterrence. This type of control insulation can be particularly valuable in areas prone to future infestations.
The right choice depends on attic access, roof design, and existing ventilation. Blown-in insulation is ideal for hard-to-reach corners, while batts may make future inspections simpler. Professional installers aim for consistent R-value throughout, paying attention to thin spots near eaves and around hatch openings to avoid cold spots and ice damming. Every material choice should prioritize improving energy efficiency alongside pest deterrence.
Why DIY Cleanup of Contaminated Insulation Is Risky
DIY removal of contaminated attic insulation may seem cost-effective but often increases health risks and can spread contamination through the home. Many homeowners underestimate both the biological hazards and the technical requirements involved.
Common DIY mistakes:
- Using regular dust masks instead of N-100 or P100 respirators with proper protective equipment, full-body suits, and sealed goggles
- Sweeping or using standard shop vacuums that lack HEPA filtration, which aerosolizes dried waste and pathogens
- Dragging unsealed bags of insulation through hallways, spreading contamination into bedrooms and HVAC systems
- Working without containment, allowing attic dust to settle across the whole house
Without professional training, it is easy to overlook hidden nesting areas behind knee walls, under ductwork, or around chimneys, leaving contamination in place even after hours of labour. The safe removal of contaminated insulation requires equipment and protocols that most homeowners simply do not have access to.
Reserve DIY efforts for monitoring, photographing, and documenting issues for insurance purposes, while relying on licensed attic restoration specialists for the actual removal, sanitation, and insulation replacement work.
Preventing New Wildlife Damage After Insulation Replacement
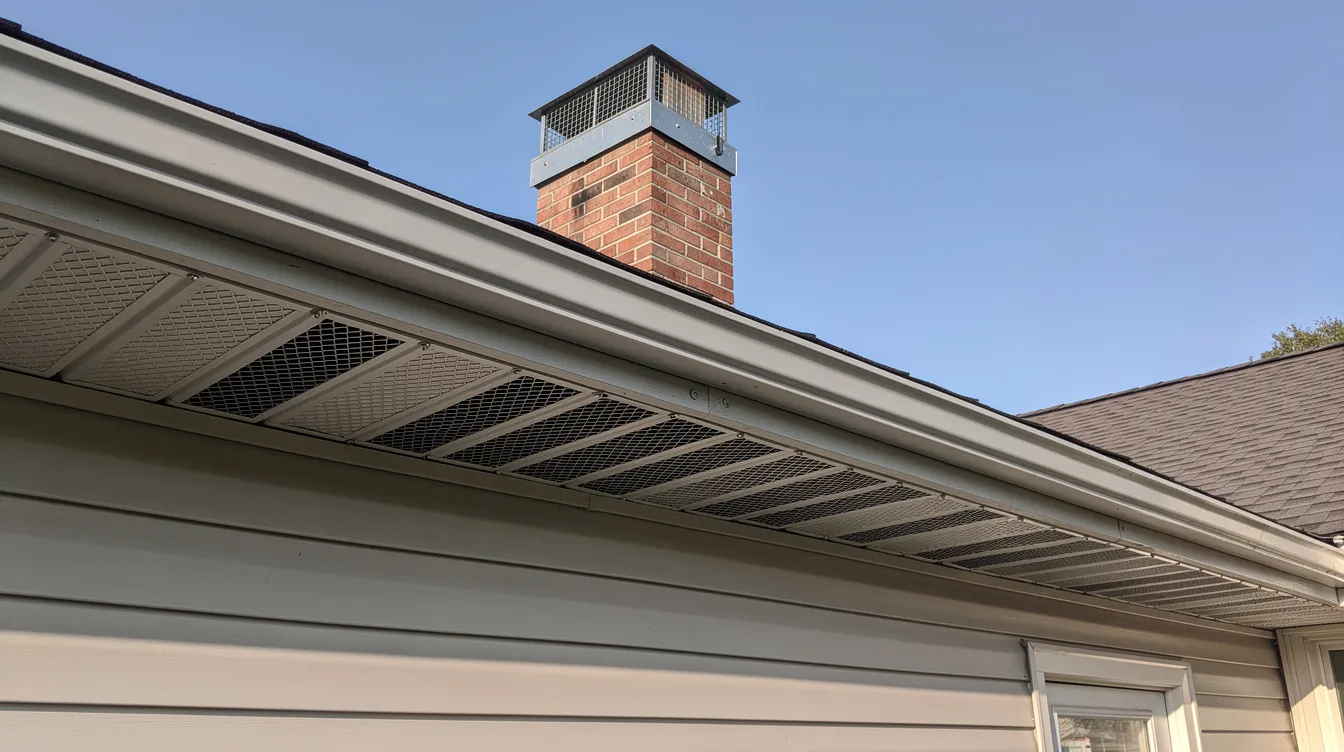
There is little value in new insulation if animals can simply re-enter the attic. Long term protection requires addressing structural vulnerabilities, seasonal nesting habits, and the property conditions that attracted wildlife in the first place. Animals can enter attics through gaps as small as a quarter, making thorough exclusion essential.
Key exclusion steps:
- Seal entry points around rooflines, soffits, and gable vents with chew-resistant metal flashing or galvanized mesh
- Screen attic vents and chimneys; repair loose shingles or fascia boards that larger animals and other pests exploit as potential entry points
- Seal small gaps around pipes, wires, and light fixtures to prevent animals entering through overlooked openings
Property maintenance:
- Trim tree branches that overhang or touch the roof
- Secure garbage bins and remove outdoor food sources that attract raccoons, squirrels, and rodents
- Maintain proper soffit-to-ridge ventilation to prevent moisture accumulation that creates a safe environment for mold
Schedule seasonal inspections in late fall and early spring to check for new gnaw marks, disturbed insulation, or fresh droppings. Many wildlife control and attic restoration companies provide warranties on exclusion work and may return to reinforce control insulation and entry-point seals if early warning signs of renewed activity appear, helping prevent future infestations before they take hold.
FAQ: Attic Insulation Safety After Wildlife Infestations
How soon after wildlife removal should I book an attic inspection?
Arrange an inspection within a few days to two weeks after the last confirmed wildlife activity. Prompt action prevents odours and health risks from worsening and helps document damage for potential insurance claims. Booking early also allows professionals to schedule attic restoration before peak busy seasons in late fall or early spring, when demand surges as animals seek shelter.
Will my home insurance cover contaminated attic insulation?
Coverage varies widely. Some policies cover sudden, accidental damage but exclude gradual or wildlife-related contamination. Contact your insurer with dated photos, inspection reports, and wildlife removal invoices to determine eligibility. Many restoration companies can help prepare detailed quotes specifically formatted for insurance submissions.
How long does full attic insulation replacement usually take?
Timelines depend on attic size, access, and contamination level. A typical project involves one day for inspection and prep, one day for carefully removed insulation, and one to two days for decontamination and re-insulation. Homeowners can usually remain in the home, though limiting access to upper floors during the dustiest stages is advisable.
Can I stay in the house during attic decontamination?
Most families can remain in the home because professionals isolate the work zone, use HEPA filtration, and vent air outside during the remediation process. However, those with severe allergies, asthma, or compromised immune systems may choose to be away during the most intensive stages and return once decontamination and odour control are complete.
How often should I re-check my attic after restoration?
A quick visual check or professional inspection once or twice a year-ideally after major storms and at the start of winter-ensures entry-point seals and new insulation remain intact. Investigate promptly if you hear scratching, find droppings near the attic hatch, or notice sudden changes in odour or energy bills, as these are early warning signs of a new infestation requiring immediate attention.
Squirrel Removal, Bird Removal, Raccoon Removal,